最近在找实例分割代码,我在win10环境下配置,配置了很久很久,很多坑,记录一下
项目简介
Maskrcnn_Benchmark 是 MaskRCNN 的 Pytorch 实现版本,MaskRCNN是本身是Tensorflow实现,用于实例分割。
项目地址:https://github.com/facebookresearch/maskrcnn-benchmark?spm=a2c4e.10696291.0.0.76e419a4t4nrMc
环境准备
win10 Home + Anaconda3 + CUDA 9.0 + CUDNN 7.1 + visualcppbuildtools_full
最后一个软件看可以代替 Visual Studio
下载地址:https://pan.baidu.com/s/1J0CAz_d9semPyiEWu8nIbg 提取码:k490
安装步骤
按照官方教程以及一些改动即可。
参照这个博客: https://www.jianshu.com/p/e9680d0bfa5c
下述是官方安装教程搬运,具体参照上述博客更好。
open a cmd and change to desired installation directory
from now on will be refered as INSTALL_DIR
conda create --name maskrcnn_benchmark
conda activate maskrcnn_benchmark

# this installs the right pip and dependencies for the fresh python
conda install ipython

# maskrcnn_benchmark and coco api dependencies
pip install ninja yacs cython matplotlib tqdm opencv-python

# follow PyTorch installation in https://pytorch.org/get-started/locally/
# we give the instructions for CUDA 9.0
## Important : check the cuda version installed on your computer by running the command in the cmd :
nvcc -- version
conda install -c pytorch pytorch-nightly torchvision cudatoolkit=9.0

git clone https://github.com/cocodataset/cocoapi.git

    #To prevent installation error do the following after commiting cocooapi :
    #using file explorer  naviagate to cocoapi\PythonAPI\setup.py and change line 14 from:
    #extra_compile_args=['-Wno-cpp', '-Wno-unused-function', '-std=c99'],
    #to
    #extra_compile_args={'gcc': ['/Qstd=c99']},
    #Based on  https://github.com/cocodataset/cocoapi/issues/51

cd cocoapi/PythonAPI
python setup.py build_ext install

# navigate back to INSTALL_DIR
cd ..
cd ..
# install apex

git clone https://github.com/NVIDIA/apex.git
cd apex
python setup.py install --cuda_ext --cpp_ext
# navigate back to INSTALL_DIR
cd ..
# install PyTorch Detection

git clone https://github.com/Idolized22/maskrcnn-benchmark.git
cd maskrcnn-benchmark

# the following will install the lib with
# symbolic links, so that you can modify
# the files if you want and won't need to
# re-build it
python setup.py build develop
踩坑
我卡了三天,各种安装卸载Visual Studio,总结以下问题:
-
可以不需要
Visual Studio!!! -
pytorch1.0中,torchvision安装错误
出问题先
import torchimport torchvision看是否出错,我的torchvision是pillow库出错,换了个版本的pillow库解决的。 -
编译时找不到文件
上述提到到编译软件需要添加环境变量
-
CUDA编译错误
CUDA文件需要按照上述安装步骤中做相应改动,我文件改错了所以导致cuda一直出错
-
Link Error 链接错误
直接百度错误,复制两个文件到一个目录即可
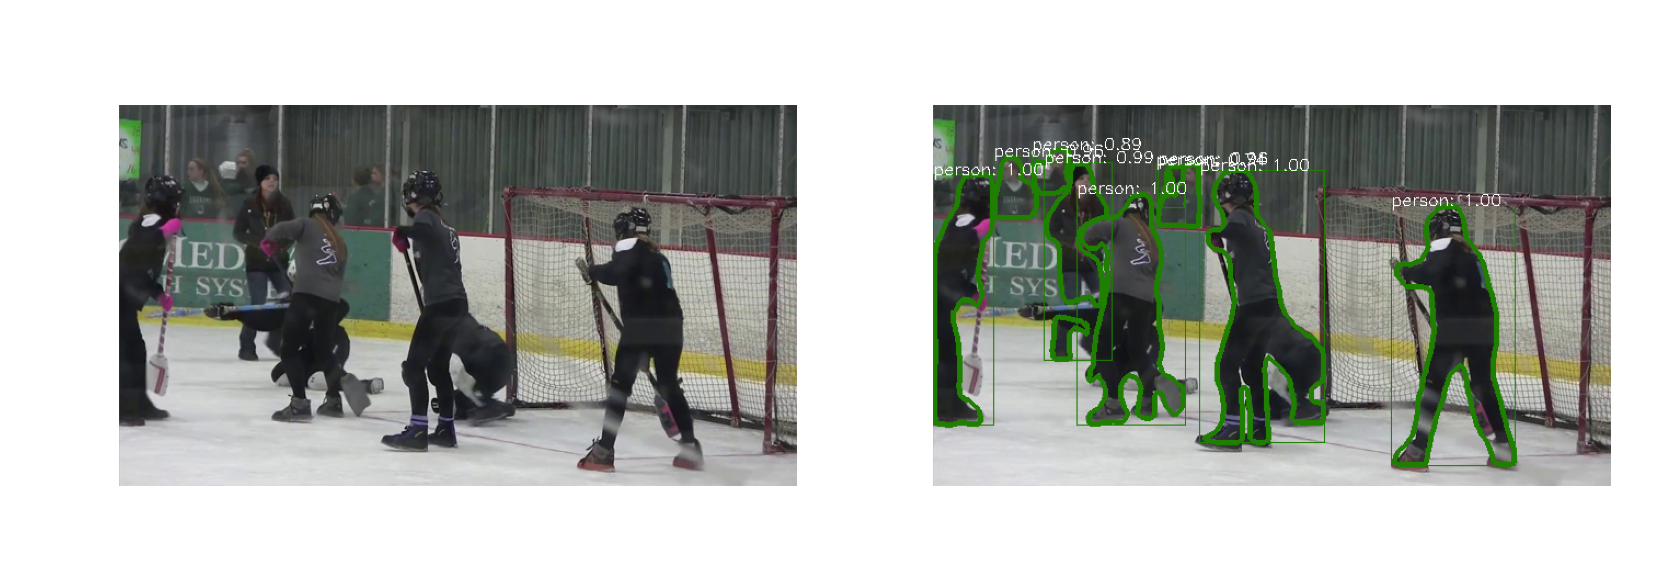
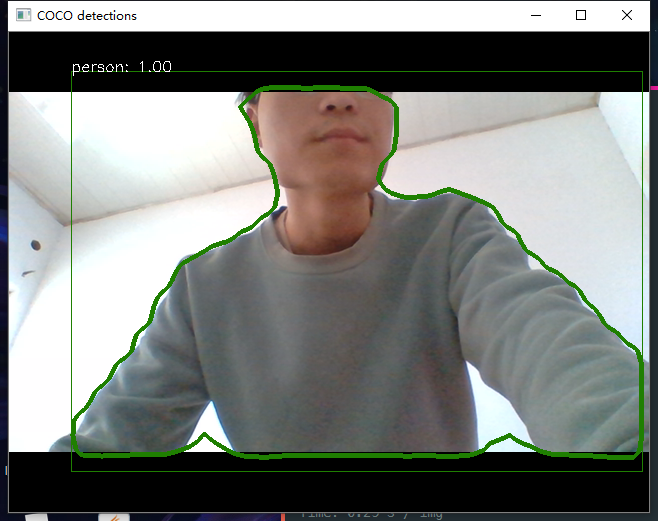
Demo运行
Jupyter Notebook 程序我这边没跑起来,但是摄像头demo、自己的本地demo跑起来了,Jupyter Notebook demo跑不起来可以用以下的代码代替:运行直接 python demo.py .
#!--*-- coding:utf-8 --*--

import matplotlib.pyplot as plt
import matplotlib.pylab as pylab

#import requests
from io import BytesIO
from PIL import Image
import numpy as np

pylab.rcParams['figure.figsize'] = 20, 12

from maskrcnn_benchmark.config import cfg
from predictor import COCODemo


# 参数配置文件
config_file = "../configs/caffe2/e2e_mask_rcnn_R_50_FPN_1x_caffe2.yaml"

cfg.merge_from_file(config_file)
cfg.merge_from_list(["MODEL.DEVICE", "cpu"])
# cfg.MODEL.WEIGHT = '../pretrained/e2e_mask_rcnn_R_50_FPN_1x.pth'

coco_demo = COCODemo(cfg, min_image_size=800, confidence_threshold=0.7, )


imgfile = '../images/1.jpg'
pil_image = Image.open(imgfile).convert("RGB")

image = np.array(pil_image)[:, :, [2, 1, 0]]

# forward predict
predictions = coco_demo.run_on_opencv_image(image)

# vis
plt.subplot(1, 2, 1)
plt.imshow(image[:,:,::-1])
plt.axis('off')

plt.subplot(1, 2, 2)
plt.imshow(predictions[:,:,::-1])
plt.axis('off')
plt.show()
效果图